Posted by Angela_Petteys
This post was originally in YouMoz, and was promoted to the main blog because it provides great value and interest to our community. The author's views are entirely his or her own and may not reflect the views of Moz, Inc.
If the name "Google Webmaster Tools" rings a bell for you, then you might already have an idea of what Google Search Console is. Since Google Webmaster Tools (GWT) has become a valuable resource for so many different types of people besides webmasters—marketing professionals, SEOs, designers, business owners, and app developers, to name a few—Google decided to change its name in May of 2015 to be more inclusive of its diverse group of users.
If you aren't familiar with GWT or Google Search Console, let's head back to square one. Google Search Console is a free service that lets you learn a great deal of information about your website and the people who visit it. You can use it to find out things like how many people are visiting your site and how they are finding it, whether more people are visiting your site on a mobile device or desktop computer, and which pages on your site are the most popular. It can also help you find and fix website errors, submit a sitemap, and create and check a robots.txt file.
Ready to start taking advantage of all that Google Search Console has to offer? Let's do this.
Adding and verifying a site in Google Search Console
If you're new to Google Search Console, you'll need to add and verify your site(s) before you can do anything else. Adding and verifying your site in Search Console proves to Google that you're either a site's owner, webmaster, or other authorized user. After all, Search Console provides you with all sorts of incredibly detailed information and insights about a site's performance. Google doesn't want to hand that kind of information over to anybody who asks for it.
Adding a site to Search Console is a very simple process. First, log into your Search Console account. Once you're logged in, you'll see a box next to a red button which says "Add Property."

Enter the URL of the site you're trying to add in the box and click "Add Property." Congratulations, your site is now added to your Search Console account!
Next, you will be asked to verify your site. There are a few different ways you can go about this. Which method will work best for you depends on whether or not you have experience working with HTML, if you have access to upload files to the site, the size of your site, and whether or not you have other Google programs connected to your site. If this sounds overwhelming, don't worry—we'll help you figure it out.
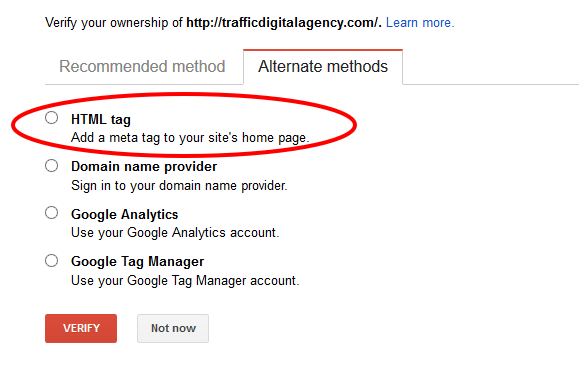
Adding an HTML tag
This verification method is best for users and site owners who have experience working with HTML code.

From the Search Console dashboard, select "Manage Property," then "Verify this property." If the "HTML Tag" option does not appear under "Recommended method," then you should click on the "Alternate methods" tab and select "HTML tag." This will provide you with the HTML code you'll need for verification.
Copy the code and use your HTML editor to open the code for your site's homepage. Paste the code provided within in the <Head> section of the HTML code. If your site already has a meta tag or other code in the <Head> section, it doesn't matter where the verification code is placed in relation to the other code; it simply needs to be in the <Head> section. If your site doesn't have a <Head> section, you can create one for the sake of verifying the site.
Once the verification code has been added, save and publish the updated code, and open your site's homepage. From there, view the site's source code. The verification code should be visible in the <Head> section.
Once you're sure the code is added to your site's homepage, go back to Search Console and click "Verify." Google will then check your site's code for the verification code. If the code is found, you will see a screen letting you know the site has been verified. If not, you will be provided with information about the errors it encountered.
When your site has been verified by Search Console, do not remove the verification code from your site. If the code is removed, it will cause your site to become unverified.
Uploading an HTML file
To use this method, you must be able to upload files to a site's root directory.
From the Search Console dashboard, select "Manage site," then "Verify this site." If "HTML file upload" is not listed under "Recommended method," it should be listed under the "Alternate method" tab. 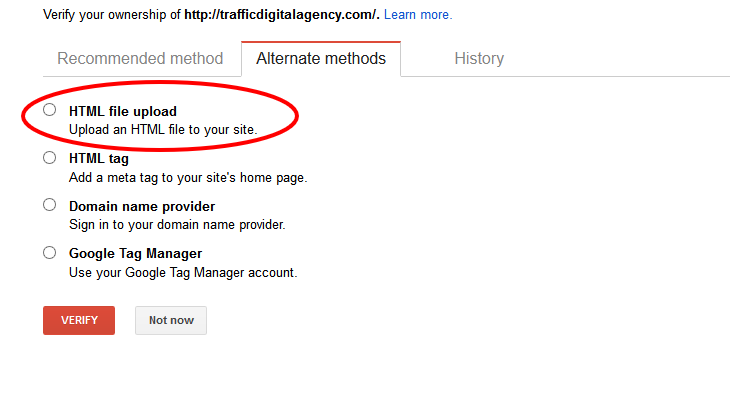
When you select this method, you will be asked to download an HTML file. Download it, then upload it to the specified location. Do not make any changes to the content of the file or the filename; the file needs to be kept exactly the same. If it is changed, Search Console will not be able to verify the site.
After the HTML file has been uploaded, go back to Search Console and click "Verify." If everything has been uploaded correctly, you will see a page letting you know the site has been verified.
Once you have verified your site using this method, do not delete the HTML file from your site. This will cause your site to become unverified.
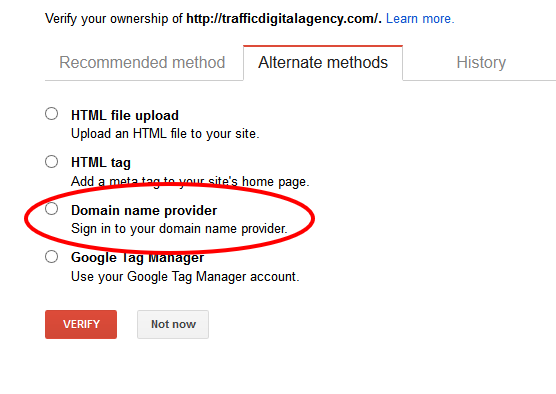
Verifying via domain name provider
The domain name provider is the company you purchased a domain from or where your website is hosted. When you verify using your domain name provider, it not only proves you're the owner of the main domain, but that you also own all of the subdomains and subdirectories associated with it. This is an excellent option if you have a large website.
From the Search Console dashboard, select "Manage site," then "Verify this site." If you don't see the "Domain name provider" option listed under "Recommended method," look under the "Alternate method" tab.
When you select "Domain name provider," you will be asked to choose your domain name provider from a list of commonly used providers, such as GoDaddy.com. If your provider is not on this list, choose "Other" and you will be given instructions on how to create a DNS TXT record for your provider. If a DNS TXT record doesn't work for your provider, you will have the option of creating a CNAME record instead.
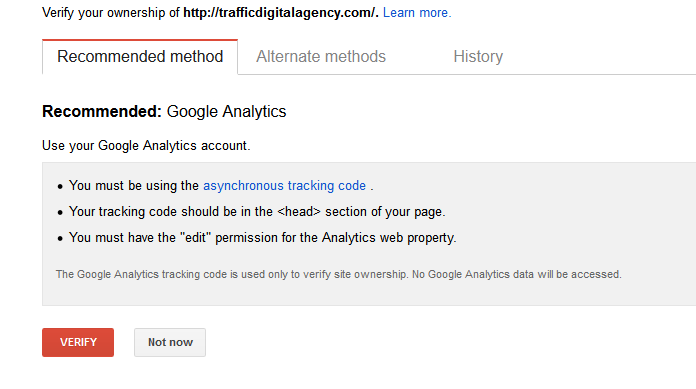
Adding Google Analytics code
If you already use Google Analytics (GA) to monitor your site's traffic, this could be the easiest option for you. But first, you'll need to be able to check the site's HTML code to make sure the GA tracking code is placed within the <Head> section of your homepage's code, not in the <Body> section. If the GA code is not already in the <Head> section, you'll need to move it there for this method to work.
From the Search Console dashboard, select "Manage site," then "Verify this site." If you don't see the "Google Analytics tracking code" option under the "Recommended method," look under the "Alternate method" tab. When you select "Google Analytics tracking method," you'll be provided with a series of instructions to follow.
Once your site has been verified, do not remove the GA code from your site, or it will cause your site to become unverified.
Using Google Tag Manager
If you already use Google Tag Manager (GTM) for your site, this might be the easiest way to verify your site. If you're going to try this method, you need to have "View, Edit, and Manage" permissions enabled for your account in GTM. Before trying this method, look at your site's HTML code to make sure the GTM code is placed immediately after your site's <Body> tag.
From the Search Console dashboard, select "Manage site," then "Verify this site." If you don't see the "Google Tag Manager" option listed under "Recommended method," it should appear under "Alternate method."
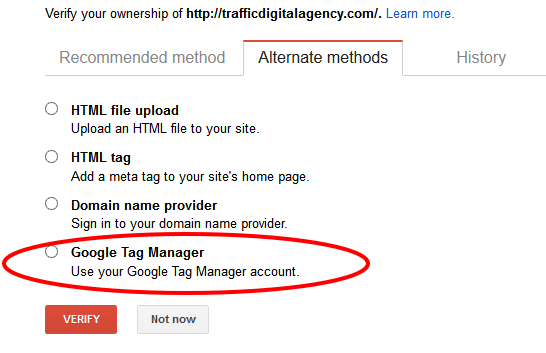
Select "Google Tag Manager" and click "Verify." If the Google Tag Manager code is found, you should see a screen letting you know your site has been verified.
Once your site is verified, do not remove the GTM code from your site, or your site will become unverified.
How to link Google Analytics with Google Search Console
Google Analytics and Google Search Console might seem like they offer the same information, but there are some key differences between these two Google products. GA is more about who is visiting your site—how many visitors you're getting, how they're getting to your site, how much time they're spending on your site, and where your visitors are coming from (geographically-speaking). Google Search Console, in contrast, is geared more toward more internal information—who is linking to you, if there is malware or other problems on your site, and which keyword queries your site is appearing for in search results . Analytics and Search Console also do not treat some information in the exact same ways, so even if you think you're looking at the same report, you might not be getting the exact same information in both places.
To get the most out of the information provided by Search Console and GA, you can link accounts for each one together. Having these two tools linked will integrate the data from both sources to provide you with additional reports that you will only be able to access once you've done that. So, let's get started:
Has your site been added and verified in Search Console? If not, you'll need to do that before you can continue.
From the Search Console dashboard, click on the site you're trying to connect. In the upper righthand corner, you'll see a gear icon. Click on it, then choose "Google Analytics Property."

This will bring you to a list of Google Analytics accounts associated with your Google account. All you have to do is choose the desired GA account and hit "Save." Easy, right? That's all it takes to start getting the most out of Search Console and Analytics.
Adding a sitemap
Sitemaps are files that give search engines and web crawlers important information about how your site is organized and the type of content available there. Sitemaps can include metadata, with details about your site such as information about images and video content, and how often your site is updated.
By submitting your sitemap to Google Search Console, you're making Google's job easier by ensuring they have the information they need to do their job more efficiently. Submitting a sitemap isn't mandatory, though, and your site won't be penalized if you don't submit a sitemap. But there's certainly no harm in submitting one, especially if your site is very new and not many other sites are linking to it, if you have a very large website, or your if site has many pages that aren't thoroughly linked together.
Before you can submit a sitemap to Search Console, your site needs to be added and verified in Search Console. If you haven't already done so, go ahead and do that now.
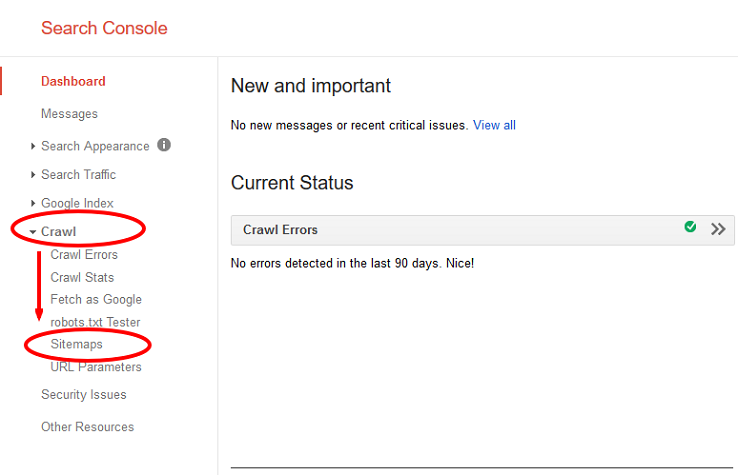
From your Search Console dashboard, select the site you want to submit a sitemap for. On the left, you'll see an option called "Crawl." Under "Crawl," there will be an option marked "Sitemaps."
Click on "Sitemaps." There will be a button marked "Add/Test Sitemap" in the upper righthand corner.
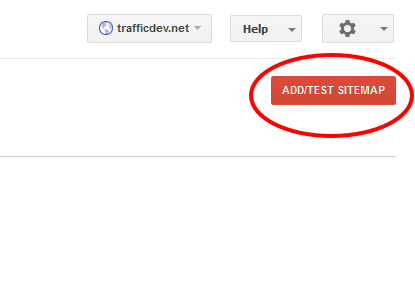
This will bring up a box with a space to add text to it.
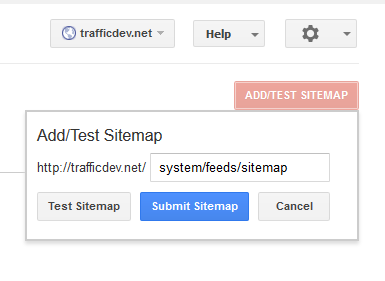
Type "system/feeds/sitemap" in that box and hit "Submit sitemap." Congratulations, you have now submitted a sitemap!
Checking a robots.txt file
Having a website doesn't necessarily mean you want to have all of its pages or directories indexed by search engines. If there are certain things on your site you'd like to keep out of search engines, you can accomplish this by using a robots.txt file. A robots.txt file placed in the root of your site tells search engine robots (i.e., web crawlers) what you do and do not want indexed by using commands known as the robots Exclusion Standard.
It's important to note that robots.txt files aren't necessarily guaranteed to be 100% effective in keeping things away from web crawlers. The commands in robots.txt files are instructions, and although the crawlers used by credible search engines like Google will accept them, it's entirely possible that a less reputable crawler will not. It's also entirely possible for different web crawlers to interpret commands differently. Robots.txt files also will not stop other websites from linking to your content, even if you don't want it indexed.
If you want to check your robots.txt file to see exactly what it is and isn't allowing, log into Search Console and select the site whose robots.txt file you want to check. Haven't already added or verified your site in Search Console? Do that first.
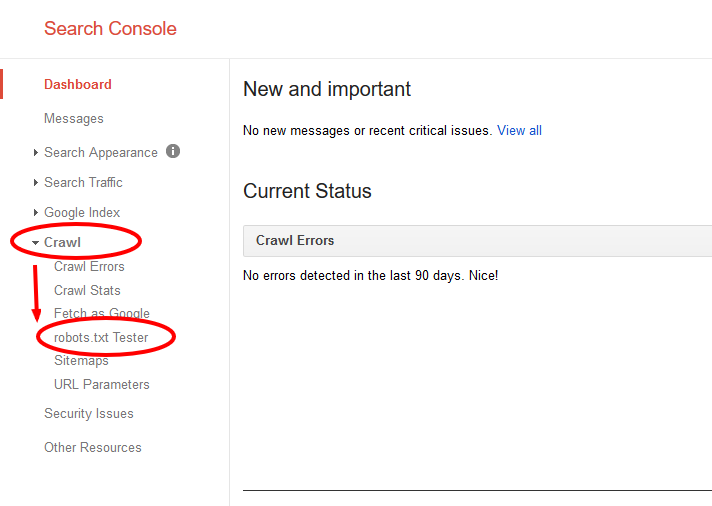
On the lefthand side of the screen, you'll see the option "Crawl." Click on it and choose "robots.txt Tester." The Robots.txt Tester Tool will let you look at your robots.txt file, make changes to it, and it alert you about any errors it finds. You can also choose from a selection of Google's user-agents (names for robots/crawlers) and enter a URL you wish to allow/disallow, and run a test to see if the URL is recognized by that crawler.
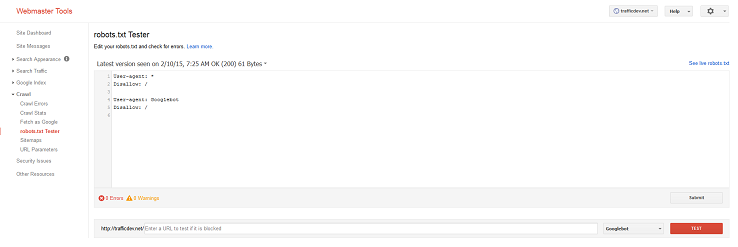
If you make any changes to your robots.txt file using Google's robots.txt tester, the changes will not be automatically reflected in the robots.txt file hosted on your site. Luckily, it's pretty easy to update it yourself. Once your robots.txt file is how you want it, hit the "Submit" button underneath the editing box in the lower righthand corner. This will give you the option to download your updated robots.txt file. Simply upload that to your site in the same directory where your old one was (www.example.com/robots.txt). Obviously, the domain name will change, but your robots.txt file should always be named "robots.txt" and the file needs to be saved in the root of your domain, not www.example.com/somecategory/robots.txt.
Back on the robots.txt testing tool, hit "Verify live version" to make sure the correct file is on your site. Everything correct? Good! Click "Submit live version" to let Google know you've updated your robots.txt file and they should crawl it. If not, re-upload the new robots.txt file to your site and try again.
Fetch as Google and submit to index
If you've made significant changes to a website, the fastest way to get the updates indexed by Google is to submit it manually. This will allow any changes done to things such as on-page content or title tags to appear in search results as soon as possible.
The first step is to sign into Google Search Console. Next, select the page you need to submit. If the website does not use the 'www.' prefix, then make sure you click on the entry without it (or vice versa.)
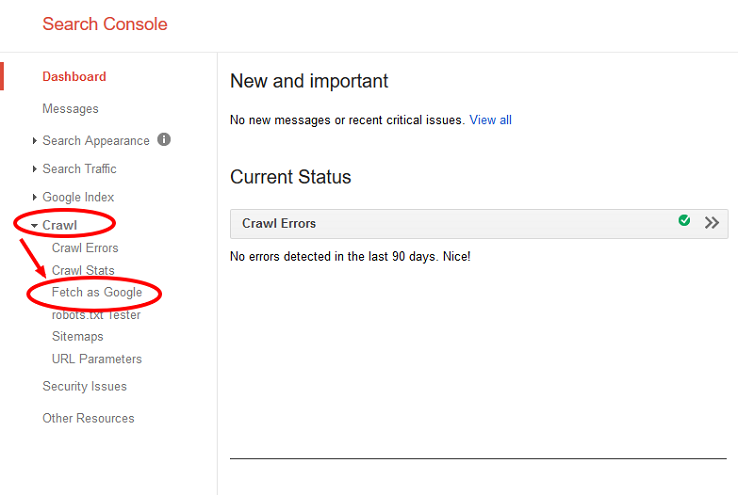
On the lefthand side of the screen, you should see a "Crawl" option. Click on it, then choose "Fetch as Google."
Clicking on "Fetch as Google" should bring you to a screen that looks something like this:
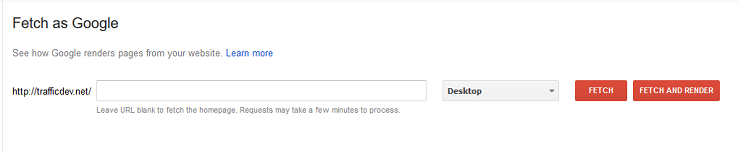
If you need to fetch the entire website (such as after a major site-wide update, or if the homepage has had a lot of remodeling done) then leave the center box blank. Otherwise, use it to enter the full address of the page you need indexed, such as http://example.com/category. Once you enter the page you need indexed, click the "Fetch and Render" button. Fetching might take a few minutes, depending on the number/size of pages being fetched.
After the indexing has finished, there will be a "Submit to Index" button that appears in the results listing at the bottom (near the "Complete" status). You will be given the option to either "Crawl Only This URL," which is the option you want if you're only fetching/submitting one specific page, or "Crawl This URL and its Direct Links," if you need to index the entire site.
Click this, wait for the indexing to complete, and you're done! Google now has sent its search bots to catalog the new content on your page, and the changes should appear in Google within the next few days.
Site errors in Google Search Console
Nobody wants to have something wrong on their website, but sometimes you might not realize there's a problem unless someone tells you. Instead of waiting for someone to tell you about a problem, Google Search Console can immediately notify you of any errors it finds on on your site.
If you want to check a site for internal errors, select the site you'd like to check. On the lefthand side of the screen, click on "Crawl," then select "Crawl Errors."
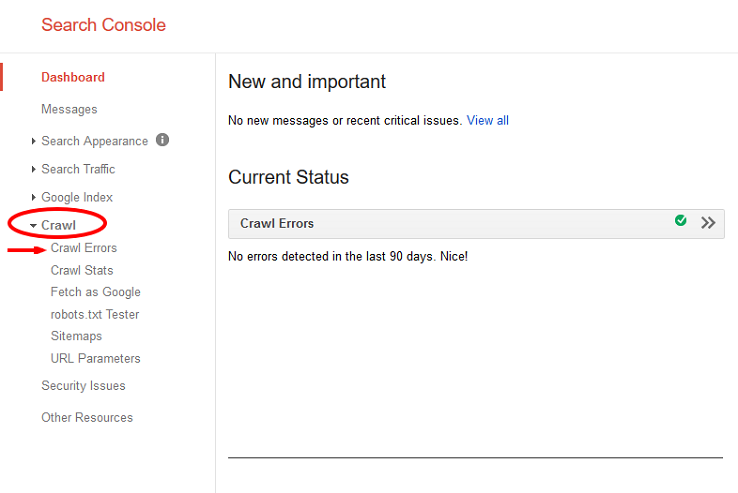
You will then be taken directly to the Crawl Errors page, which displays any site or URL errors found by Google's bots while indexing the page. You will see something like this:
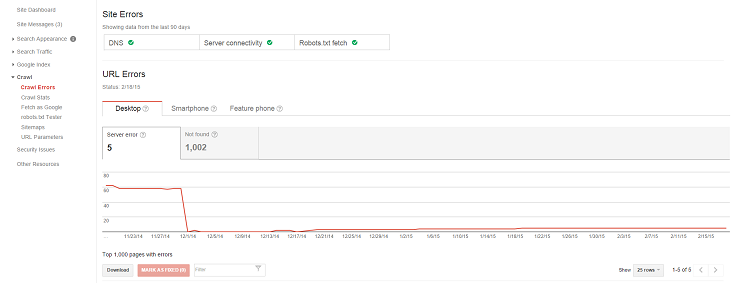
Any URL errors found will be displayed at the bottom. Click on any of the errors for a description of the error encountered and further details.
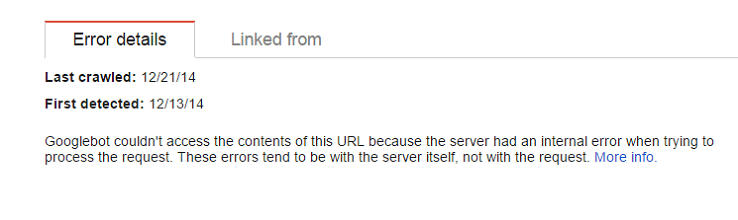
Record any encountered errors, including screenshots if appropriate. If you aren't responsible for handling site errors, notify the person who is so they can correct the problem(s).
We hope this guide has been helpful in acquainting you with Google Search Console. Now that everything is set up and verified, you can start taking in all the information that Google Search Console has for you.
Sign up for The Moz Top 10, a semimonthly mailer updating you on the top ten hottest pieces of SEO news, tips, and rad links uncovered by the Moz team. Think of it as your exclusive digest of stuff you don't have time to hunt down but want to read!
No comments:
Post a Comment